
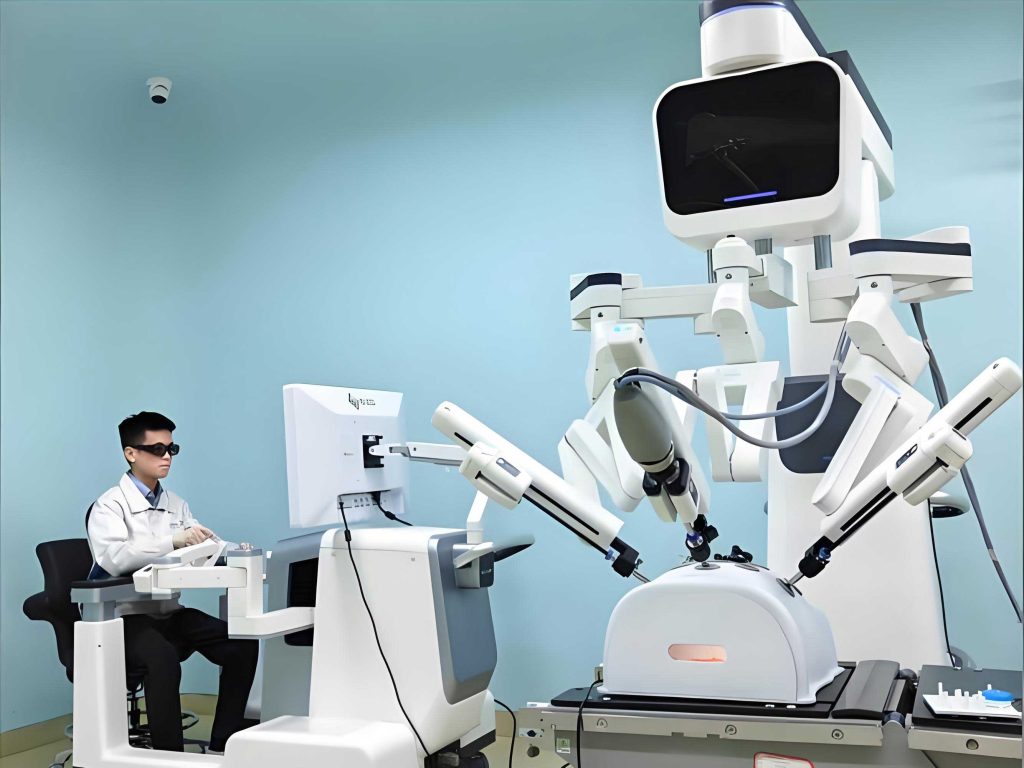
In recent years, the rapid advancement of medical technology has fueled a growing demand for complex surgical procedures that require high precision and stability. Traditional manual surgery often falls short in meeting these demands, leading to the emergence of medical robots as a transformative solution. Medical robots offer advantages such as fast response times, flexibility, and the ability to achieve precise control in intricate surgeries, particularly in minimally invasive procedures. However, the development and promotion of medical robots in some regions lag behind global standards, partly due to limited public awareness and understanding. To address this, I focus on designing simulation animations for medical robots, leveraging tools like SolidWorks and 3DMax to create immersive and educational visualizations. This approach aims to enhance the visibility and comprehension of medical robots, thereby fostering research and accelerating the growth of the domestic medical robotics industry.
The significance of medical robots cannot be overstated, as they represent a convergence of robotics, medicine, and computer science. In this paper, I explore the process of developing simulation animations for medical robots, starting from conceptual design to final video production. By employing SolidWorks for 3D modeling and 3DMax for animation, I demonstrate how these software tools can be integrated to produce high-quality simulations that mimic real-world surgical scenarios. Throughout this work, the term “medical robot” is emphasized to underscore its centrality in modern healthcare innovations. The ultimate goal is to create animations that are not only technically accurate but also engaging, serving as powerful tools for education, training, and promotional activities.
To provide context, let me review the global and domestic landscape of medical robot development. The evolution of medical robots has been marked by key milestones, as summarized in Table 1. This table highlights the progression from early experimental systems to advanced commercial platforms, illustrating the growing sophistication of medical robot technology.
| Year | Development | Significance |
|---|---|---|
| 1985 | PUMA 560 robot used for brain tissue biopsy | Marked the inception of medical robot applications in surgery |
| 1991 | Active robotic system for knee replacement surgery | Introduced computer-programmed robotic platforms for surgical procedures |
| 1994 | AESOP surgical robot system FDA-approved | First commercial surgical robot, enabling minimally invasive surgeries |
| 1999 | Da Vinci surgical system launched | Advanced robotic platform for precise microsurgery, widely adopted globally |
| 2000s | Domestic systems like “Miao Shou” in China | Local innovations aimed at reducing reliance on imported medical robots |
From Table 1, it is evident that medical robots have evolved from rudimentary assistive devices to integral components of modern operating rooms. However, in many regions, the adoption of medical robots faces challenges such as high costs, limited training, and technological barriers. My work seeks to mitigate these issues by creating simulation animations that lower the entry barrier for understanding medical robot functionality. For instance, the kinematics of a medical robot can be described using mathematical models, such as the Denavit-Hartenberg parameters, which define the transformation between joints. The forward kinematics equation for a medical robot with n joints is given by:
$$ \mathbf{T} = \prod_{i=1}^{n} \mathbf{A}_i $$
where $\mathbf{A}_i$ represents the homogeneous transformation matrix for joint i, and $\mathbf{T}$ is the overall transformation from the base to the end-effector. This formula is crucial for animating the movements of a medical robot in simulations, as it allows for precise control over each joint’s rotation and translation. In my design process, I apply such equations to ensure that the medical robot model moves in a realistic manner, mimicking actual surgical actions.
Moving to the design phase, I utilize SolidWorks, a powerful 3D CAD software, to create detailed models of the medical robot. SolidWorks offers modules for part design, assembly, and simulation, making it ideal for engineering applications. The medical robot I design features 6 degrees of freedom (DOF), consisting of 109 individual parts, each meticulously crafted to reflect real-world components. To facilitate future control and simulation in environments like LabVIEW, I align the coordinate axes of each joint part with its rotational axis. This alignment is critical for accurate motion representation, as it simplifies the transformation calculations. For example, the shoulder joint part, as shown in the inserted image, has its coordinate system positioned along the rotation axis, enabling smooth animations later. The design process involves both bottom-up and top-down assembly methods, but I prefer the bottom-up approach, where parts are designed separately and then assembled with precise constraints. This method ensures that the medical robot model maintains structural integrity and functional accuracy.
To compare the features of SolidWorks and 3DMax in the context of medical robot animation, I present Table 2. This table outlines the strengths of each software, highlighting their complementary roles in my workflow.
| Software | Primary Function | Advantages for Medical Robot Design | Limitations |
|---|---|---|---|
| SolidWorks | 3D CAD modeling and assembly | Precise part design, parametric modeling, simulation tools | Limited animation capabilities, less suitable for rendering |
| 3DMax | 3D animation and rendering | Advanced keyframing, realistic textures, high-quality output | Less optimized for engineering design, steeper learning curve |
As seen in Table 2, SolidWorks excels in creating accurate mechanical models, while 3DMax is superior for animating and visualizing those models. This synergy is key to my simulation animation design for medical robots. After completing the medical robot model in SolidWorks, I export it to 3DMax for animation. The export process requires careful consideration, as different file formats can affect model integrity. I evaluate several methods, summarized in Table 3, to determine the optimal approach for transferring the medical robot model.
| Method | File Format | Advantages | Disadvantages |
|---|---|---|---|
| 1 | .igs | Small file size, widely compatible | Potential errors in complex surfaces, may lose details |
| 2 | .stl | Suitable for single parts, simple import | Inefficient for assemblies, requires part-by-part import |
| 3 | .wrl | Preserves assembly structure, easy batch import | May require version and unit adjustments |
| 4 | Plugin (Power NURBS) | Direct import, maintains geometry | Long import times, possible mesh issues |
Based on Table 3, I select Method 3 (.wrl format) for importing the medical robot model into 3DMax. This choice ensures that all parts of the assembly are transferred simultaneously, with their relative positions intact. Once in 3DMax, the medical robot model retains its spatial arrangement, but the assembly constraints from SolidWorks are lost. To address this, I establish parent-child relationships between parts, allowing for coordinated movements during animation. For instance, the outer shell of the medical robot is set as the root parent, so that transformations applied to it affect the entire structure. This hierarchy is visualized using 3DMax’s Schematic View, enabling efficient management of complex models.
In 3DMax, I also reset the coordinate axes for each joint part to align with their rotational axes, as the original axes from SolidWorks are not preserved. This step involves modifying the reference coordinate system and applying relative transformations. The process can be expressed mathematically: for a part with local coordinates $\mathbf{p}_l$, the world coordinates $\mathbf{p}_w$ after axis realignment are given by:
$$ \mathbf{p}_w = \mathbf{R} \cdot \mathbf{p}_l + \mathbf{t} $$
where $\mathbf{R}$ is the rotation matrix and $\mathbf{t}$ is the translation vector. By adjusting $\mathbf{R}$ and $\mathbf{t}$ for each part, I ensure that the medical robot’s joints rotate correctly around their intended axes. This is essential for creating realistic animations that simulate surgical tasks, such as grasping instruments or making incisions. To enhance visual realism, I apply textures and materials to the medical robot model, such as a metallic silver finish for the arms, and incorporate environmental elements like a patient bed and surgical tools.
The animation design in 3DMax revolves around keyframing, where I define specific poses for the medical robot at different time points. The timeline in 3DMax uses frames to represent time, with 30 frames equating to 1 second. For my simulation, I create over 2,700 frames, resulting in an animation of approximately 1.5 minutes. The keyframing process involves setting transformation keys for each joint’s rotation and translation, using the Curve Editor to smooth motion paths. The velocity of a joint movement can be described by the derivative of its position over time:
$$ v(t) = \frac{d\mathbf{p}(t)}{dt} $$
where $\mathbf{p}(t)$ is the position vector at time t. By controlling $v(t)$ through keyframe interpolation, I achieve fluid and natural motions for the medical robot. For example, during a simulated surgery, the medical robot’s arm might follow a trajectory defined by a Bezier curve, ensuring precise and steady movement. The animation includes multiple sequences, such as approach, manipulation, and retraction phases, each designed to reflect real-world surgical protocols.
After animating the medical robot, I proceed to rendering, which converts the 3D scene into a sequence of images or a video. To maximize quality, I render each frame as a high-pixel image, rather than directly outputting a video. The rendering settings are optimized for clarity and detail, including adjustments for lighting, shadows, and anti-aliasing. The rendering equation, which models light transport, can be simplified for this context:
$$ L_o(\mathbf{x}, \omega_o) = L_e(\mathbf{x}, \omega_o) + \int_{\Omega} f_r(\mathbf{x}, \omega_i, \omega_o) L_i(\mathbf{x}, \omega_i) (\omega_i \cdot \mathbf{n}) \, d\omega_i $$
where $L_o$ is the outgoing radiance, $L_e$ is the emitted radiance, $f_r$ is the bidirectional reflectance distribution function, and $L_i$ is the incoming radiance. While 3DMax handles these computations internally, understanding this equation helps in configuring render parameters for realistic visuals. To avoid black borders in the output, I use the crop region feature in 3DMax, tailoring the render area to focus on the medical robot and its surroundings. The resulting image sequence is then compiled into a video using Adobe Premiere, where I add effects or transitions if needed. Additionally, I generate GIF animations for easier integration into presentations, enhancing the promotional utility of the simulation.
The impact of this simulation animation design for medical robots extends beyond mere visualization. It serves as an educational tool for training surgeons, a marketing asset for manufacturers, and a research aid for developers. By demystifying the operations of a medical robot, these animations can accelerate adoption and innovation. For instance, they can be used to simulate rare surgical scenarios, allowing for practice without risk. Moreover, the animations highlight the technical capabilities of medical robots, such as their precision and versatility, which are quantified through metrics like error margins and task completion times. In terms of performance, the accuracy of a medical robot in animation can be assessed using error functions, such as the mean squared error between planned and executed trajectories:
$$ \text{MSE} = \frac{1}{n} \sum_{i=1}^{n} (\mathbf{p}_{\text{planned}, i} – \mathbf{p}_{\text{animated}, i})^2 $$
where $\mathbf{p}_{\text{planned}, i}$ and $\mathbf{p}_{\text{animated}, i}$ are the planned and animated positions at frame i, respectively. Minimizing this error ensures that the animation faithfully represents the intended motions of the medical robot.
In conclusion, my work on simulation animation design for medical robots leverages the strengths of SolidWorks and 3DMax to create detailed, dynamic visualizations. From initial modeling to final rendering, each step is guided by engineering principles and artistic considerations, resulting in animations that are both informative and engaging. The repeated emphasis on “medical robot” throughout this process underscores its importance as a technological marvel in healthcare. As medical robots continue to evolve, tools like simulation animations will play a crucial role in bridging the gap between innovation and application, ultimately contributing to improved surgical outcomes and broader accessibility. Future directions may include integrating virtual reality for immersive training or using machine learning to automate animation generation. Regardless, the foundation laid by this design approach will remain vital for advancing the field of medical robotics.