
In my exploration of robotic platforms, the robot dog presents a fascinating challenge in biomimetic locomotion and intelligent control. This article details my first-person perspective on designing the control system for an autonomous walking robot dog. The primary objective was to achieve stable, multi-gait terrestrial movement through a modular and computationally efficient architecture. The core of my design hinges on a multi-degree-of-freedom (DoF) joint structure actuated by servo motors, all orchestrated by a single microcontroller unit (MCU).
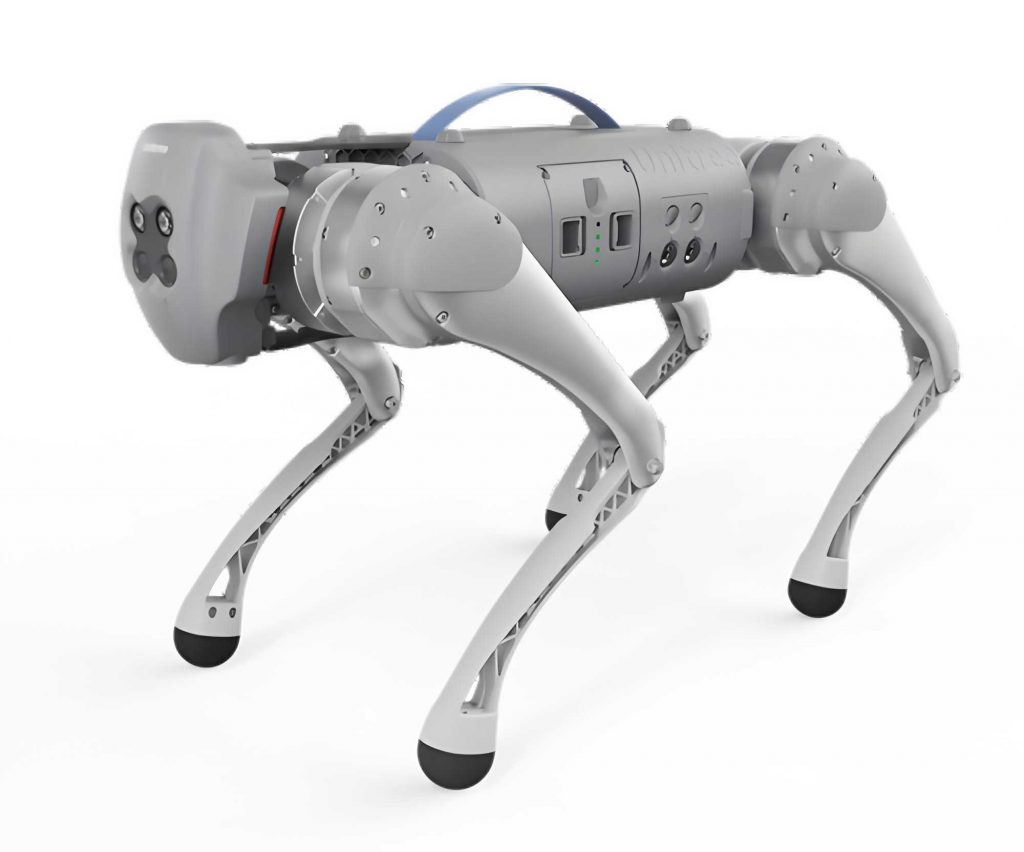
The physical embodiment of my robot dog follows a quadrupedal, jointed design. This configuration successfully provides the necessary kinematics for basic mobility functions such as forward/backward walking and lateral crawling on flat surfaces. Each active joint is implemented using a Futaba S3003 servo motor, responsible for swinging the legs and head. This choice leverages the servo’s inherent characteristics: high torque, straightforward control, flexible assembly, and cost-effectiveness, which are ideal for prototyping a functional robot dog.
System Hardware Architecture Design
The hardware foundation for my robot dog is built around three critical modules: the servo actuator array, the user input interface, and the multi-rail power supply system. Each module was carefully selected and integrated to balance performance, resource constraints, and reliability.
1. Servo Actuator Module Design
The locomotion of the robot dog is entirely dependent on precise angular control of its joints. With a total of 9 degrees of freedom, the system requires simultaneous control over 9 individual servo motors. The Futaba S3003 servo is, in essence, a positionable miniature DC motor with integrated control circuitry and gearing—a smart actuator perfectly suited for robotic joints.
Each standard servo has three connection lines: power (VCC), ground (GND), and control (PWM). For the S3003, the operating voltage range is 4.8V to 6.0V. It’s crucial to power the servos from a source separate from the logic circuitry due to the significant electrical noise they generate during operation.
The servo’s angular position is determined by the width of a pulse sent to its control line. This pulse must be part of a periodic signal, typically with a period (T) of 20ms. The servo’s output arm rotates to an angle proportional to the pulse width (tpulse) within a specific range. The relationship between the input pulse width and the resulting output angle (θ) for the S3003 servo in my robot dog is summarized in the table below.
| Pulse Width tpulse (ms) | Duty Cycle δ (%) | Servo Output Angle θ (degrees) |
|---|---|---|
| 0.60 | 3.0 | -90 |
| 0.89 | 4.45 | -45 |
| 1.44 | 7.2 | 0 (Neutral) |
| 2.05 | 10.25 | +45 |
| 2.32 | 11.6 | +90 |
The control logic can be generalized with a linear approximation formula. The duty cycle δ is defined as:
$$ \delta = \frac{t_{pulse}}{T} \times 100\% $$
where T = 20ms. The corresponding angle θ is approximately:
$$ \theta \approx k \cdot (t_{pulse} – t_{center}) $$
or in terms of duty cycle:
$$ \theta \approx k’ \cdot (\delta – \delta_{center}) $$
For the S3003, tcenter ≈ 1.44ms (δcenter ≈ 7.2%), and the scale factor k is approximately 90 degrees per 0.86ms pulse width change. This predictable relationship is fundamental to programming the movements of the robot dog.
2. User Input (Keyboard) Module Design
During the development and debugging phase, a direct interface for commanding the robot dog is essential. To conserve valuable I/O pins on the MCU for other critical functions like servo control and sensors, I opted for a 4×4 matrix keyboard design. This configuration uses 8 general-purpose I/O pins (4 rows and 4 columns) to interface with 16 discrete keys, effectively doubling the input capacity compared to a direct, one-pin-per-key approach.
The matrix works by connecting switches at the intersections of row and column lines. The scanning algorithm drives one column line low at a time while reading the state of all row lines. If a key at the intersection of the active column and a particular row is pressed, that row line will be pulled low, allowing the firmware to identify the exact key pressed based on the active column and the responding row. This efficient scanning method is key to maintaining a responsive control interface for the robot dog without exhausting system resources.
3. Power Supply Module Design
A robust and clean power delivery network is critical for the stable operation of any electronic system, especially for a dynamic platform like a robot dog. My design requires three distinct voltage rails:
- 6V Rail: Directly powers the servo motors. This is supplied by a battery pack of four series-connected 1.5V cells, providing sufficient current capacity for the high-torque demands of multiple servos moving simultaneously.
- 5V Rail: Powers the core logic circuitry, including the MCU and various digital sensors. A 7-12V lithium battery pack is regulated down to a stable 5V using an LM7805 linear voltage regulator. Adequate bulk and decoupling capacitors are placed at the input and output of the regulator to smooth voltage fluctuations and suppress noise.
- 3.3V Rail: Required for specific peripheral chips, such as a voice module. This rail is derived from the 5V supply using a low-dropout regulator (LDO) like the LM1117-3.3, ensuring efficiency and stability for low-power components.
This modular power architecture, with independent rails for motors and logic, is a standard best practice in robotics. It prevents motor-induced voltage spikes from causing resets or erratic behavior in the sensitive control electronics of the robot dog.
System Software Design and Algorithm Implementation
The intelligence of the robot dog is embedded in its software. The firmware must handle low-level servo signal generation, interpret user commands, sequence complex gait patterns, and provide tools for motion calibration. My software architecture is built around interrupt-driven timing and a structured data flow.
1. Servo Driver Program and PWM Generation
Simultaneously generating 9 independent, stable PWM signals was the foremost software challenge. While the chosen ATmega16 MCU has hardware PWM modules, they are limited in number. Therefore, I implemented a software-based PWM generation scheme using a single hardware timer interrupt.
I configured Timer0 to generate an interrupt every 20 microseconds (µs). A global counter variable increments on each interrupt. When this counter reaches 1000, it resets, defining the fundamental PWM period: $$ T_{PWM} = 1000 \times 20 \mu s = 20 ms $$. For each of the 9 servo channels, I maintain a compare value. Within the interrupt service routine (ISR), the current counter is compared to each channel’s preset value. If the counter is less than the channel’s compare value, the corresponding I/O pin is set high; otherwise, it is set low.
By setting the compare value between 50 (for 1.0ms pulse: $$ 50 \times 20 \mu s = 1.0 ms $$) and 125 (for 2.5ms pulse: $$ 125 \times 20 \mu s = 2.5 ms $$), I can produce the full range of duty cycles (2.5% to 12.5%) needed to command the robot dog‘s servos from -90° to +90°. The angle for a given compare value (CV) is calculated as:
$$ \theta_{CV} = -90 + \frac{(CV – 50)}{(125 – 50)} \times 180 $$
This method, while demanding precise timing, allows full control over all 9 servos with minimal hardware resources.
2. Matrix Keyboard Scanning Algorithm
The keyboard driver employs the “row-scan” method. The algorithm cyclically performs the following steps:
- Set one column line (Cj) to a low logic state (0), while keeping the others in a high-impedance or high state.
- Read the state of all four row lines (R0 to R3).
- If a row line Ri reads low while column Cj is active, it indicates the key at intersection (Ri, Cj) is pressed. A keycode is computed, often as: $$ KeyID = i \times N_{columns} + j $$.
- Move to the next column and repeat. Debouncing logic is applied in software to ensure a single press is registered reliably.
This non-blocking routine is called periodically from the main loop, ensuring the robot dog remains responsive to debug commands.
3. Gait Sequencing and Motion Engine
The walking intelligence of the robot dog is encoded in its motion engine. A complex gait like “walk forward” is not a single servo command but a carefully timed sequence of poses. I conceptualize a “pose” as a complete set of 9 servo angles at a specific instant in time. A “motion” is an ordered list of poses, along with timing or transition speed information.
During the development phase, I use a dedicated calibration program to create and store these poses. When the main operational program runs, it executes motions by interpolating between these stored poses. For instance, the “walk forward” motion may consist of 6 key poses (P1 to P6) that form one complete step cycle. The engine sequentially transitions the servos from P1 → P2 → … → P6. The transition speed (s) controls how many milliseconds are spent moving between poses, affecting the robot dog‘s walking speed. The engine’s core logic can be described as:
- Load Motion: Read the start address, end address, speed (s), and direction from stored command tables.
- Fetch Pose: Retrieve the target angle for each servo from the current pose data.
- Interpolate: Calculate the incremental step (Δθ) for each servo per control cycle to move from its current angle to the target angle within time ‘s’.
- Update & Check: Apply Δθ each cycle. When all servos reach their target angles within a tolerance, the engine advances to the next pose in the sequence.
- Loop: Repeat until the final pose of the motion is reached, then either stop or loop back to the start for continuous walking.
This modular approach allows me to build a library of motions (walk, turn, sit, crawl) for the robot dog by simply creating and sequencing different pose sets.
4. Motion Calibration and Debugging Program
Creating natural and stable gaits is an iterative process. A separate calibration program is vital. This program allows direct control of each servo via the keyboard. For example, keys 0-8 might select a specific servo, while other keys increment/decrement its angle. The program provides real-time feedback, letting me shape the robot dog into a desired pose (e.g., one leg forward, body tilted).
Once a stable and useful pose is achieved, pressing a “store” key (e.g., key 15) triggers the MCU to transmit the set of 9 servo angle values via a UART serial interface to a connected computer. Here, the data can be saved, labeled, and organized into the motion sequences used by the main engine. The quality and precision of this calibration data directly dictate the fluidity and balance of the final robot dog‘s movements.
Mathematical Modeling and System Optimization
To move beyond simple pre-recorded sequences, a deeper mathematical understanding of the robot dog‘s kinematics is beneficial. The position of each foot in space (forward/back, up/down, left/right) can be derived from the joint angles using forward kinematics. For a simple leg with two servos (one for the “hip” swing and one for the “knee”), the foot position (x, z) relative to the shoulder joint can be modeled as:
Let L1 be the upper leg link length and L2 be the lower leg link length. Let θ1 be the hip angle (from vertical) and θ2 be the knee angle (relative to the upper leg).
The foot position is given by:
$$ x = L_1 \cdot \sin(\theta_1) + L_2 \cdot \sin(\theta_1 + \theta_2) $$
$$ z = L_1 \cdot \cos(\theta_1) + L_2 \cdot \cos(\theta_1 + \theta_2) $$
This model allows for the calculation of inverse kinematics: determining the required joint angles (θ1, θ2) to place the foot at a desired (x, z) coordinate. Implementing such calculations enables the generation of gait patterns algorithmically, such as defining a elliptical or cycloidal foot trajectory for smooth walking. The equation for a simple elliptical trajectory for a foot during a swing phase could be parameterized as:
$$ x(t) = A_x \cdot \cos(2\pi \cdot \frac{t}{T_{stride}}) + x_{offset} $$
$$ z(t) = \begin{cases}
A_z \cdot \sin(2\pi \cdot \frac{t}{T_{stride}}) + z_{clearance} & \text{for } 0 \le t < T_{swing} \\
0 & \text{for } T_{swing} \le t < T_{stride}
\end{cases} $$
where t is time within the stride cycle, Tstride is the total cycle period, Tswing is the swing phase duration, Ax is the stride length, Az is the step height, and zclearance is the ground clearance. This level of modeling, while computationally more intensive, opens the door for adaptive and terrain-responsive behavior in the robot dog.
Performance Considerations and Future Enhancements
The current design of my robot dog focuses on foundational control. Several performance factors were considered and can be areas for future improvement:
| System Aspect | Current Implementation | Potential Enhancement | Impact on Robot Dog |
|---|---|---|---|
| PWM Generation | Software-driven, 20µs timer interrupt. | Use a MCU with more dedicated PWM hardware timers. | Frees up CPU cycles for higher-level planning, reduces jitter. |
| Gait Definition | Pre-computed pose sequences stored in memory. | Real-time inverse kinematics calculation for dynamic trajectory generation. | Enables adaptive walking over uneven surfaces and obstacle negotiation. |
| Sensing | Minimal (primarily for debugging). | Integrate IMU (gyro/accelerometer), force-sensitive resistors (FSRs) on feet, ultrasonic/distance sensors. | Provides balance feedback (stability), ground contact detection, and environmental awareness for autonomy. |
| Power Management | Simple linear regulators for logic, direct battery for servos. | Implement switch-mode regulators for higher efficiency, battery monitoring circuitry. | Extends operational lifetime, provides low-battery warnings for safe shutdown. |
| Communication | Wired UART for calibration. | Add wireless module (Bluetooth, WiFi) for remote control and telemetry. | Enables untethered operation and remote monitoring/commanding of the robot dog. |
The balance between computational load and functional complexity is a constant trade-off. The software-PWM approach, while elegant for its resourcefulness, consumes a significant portion of the MCU’s processing bandwidth. The formula for the available CPU time for main loop tasks (tmain) when using an interrupt every tint with an ISR execution time of tISR is approximately:
$$ t_{main\_cycle} \approx \frac{1}{f_{CPU}} – ( \frac{t_{ISR}}{t_{int}} ) $$
where fCPU is the clock frequency. Optimizing the ISR code to minimize tISR is therefore critical for maintaining a responsive system as features are added to the robot dog.
Conclusion
Designing the control system for this autonomous walking robot dog has been an integrative exercise in embedded systems engineering, encompassing hardware selection, real-time software design, and basic robotic kinematics. By leveraging the precise control of servo motors and structuring software around a timed-interrupt and pose-sequencing architecture, I achieved a functional platform capable of basic, stable locomotion. The modular design of both hardware (power, servos, input) and software (drivers, motion engine, calibrator) provides a solid foundation. The potential for enhancement is vast, from integrating sensor feedback for dynamic balance to implementing more sophisticated algorithmic gait generation. The journey of refining this robot dog underscores a core principle in robotics: the seamless synergy between mechanical design, electronic hardware, and intelligent software is what transforms a collection of parts into a lifelike, autonomous machine. The skills and frameworks developed through this project are directly transferable to more complex robotic systems, paving the way for future innovations in mobile robotics.