
In the context of rapid advancements in integrated circuits, 5G communications, and embedded technologies, human-computer interaction for embodied robots has become increasingly important for specialized working environments and special service populations. An embodied robot with high reliability, low cost, and ease of use that can perform dynamic interaction has become a focus of current research. Facing increasingly severe international competition, the localization of the industrial chain has become a national development strategy, and open-source and system autonomy have become the goals pursued by enterprises. Hisilicon, as a leading domestic chip manufacturer, plays a key role in China’s chip self-production process. The development and application of its products have broken foreign blockades and monopolies, which is of great significance to the independent development of China’s industry. In this paper, starting from human-computer interaction, I adopt the Hisilicon hardware platform based on ARM architecture, combine the Linux software operating system, other hardware modules, and open-source software resources to realize the real-time response and imitation function of an embodied robot to human movements. The main contents of this article include three major aspects: the construction of a video interaction system, the development of a human body joint point processing system, and the deployment of a humanoid robot control system. This article presents a complete low-cost human-computer interaction solution for the Hisilicon ecosystem and demonstrates its practical value through detailed design and experimental verification.
1. Introduction and Research Significance
The development of robotics is closely related to the progress of key technologies and the popularization of intelligent applications. From a global perspective, the development level of robots is an important indicator of a country’s scientific and technological innovation capability and high-end manufacturing level. In recent years, the robot industry in China has grown rapidly. Even under the influence of the pandemic, China’s industrial robot market contributed nearly 40% of the global share in 2020, remaining the world’s largest robot consumer for many consecutive years. However, due to the impact of the complex international environment, the development of China’s IC and related industrial chains has been hindered, and the growth rate of the robot and related industries has slowed down. How to further improve core technologies and expand robot application fields is the key to the development of the robot industry.
The embodied robot is an important branch of robotics research. Unlike traditional industrial robots, an embodied robot is designed to interact with humans and adapt to human living environments. The humanoid appearance and movement characteristics allow it to seamlessly integrate into human-centric spaces, making it an ideal platform for studying dynamic interaction. The concept of “embodied robot” emphasizes that the robot’s physical body, sensors, and actuators are closely coupled with its cognitive processes. In this project, the embodied robot is tasked with perceiving human actions through a vision system and reproducing those actions in real time, thereby achieving a sense of embodiment and mutual understanding between the human and the machine.
The significance of this work lies in the adoption of a domestic chip, the HI3518E, for the core processing unit. This choice aligns with the national strategy of reducing dependency on foreign semiconductor products. By leveraging the open-source Linux operating system and publicly available multimedia processing libraries, the entire system can be reproduced and extended by other researchers and engineers. Moreover, the video processing pipeline, including video capture, encoding, and network transmission, is built upon the Hisilicon MPP (Media Processing Platform), which provides a solid and efficient foundation for real-time applications. The combination of an affordable System-on-Chip (SoC), open-source software, and a commercially available humanoid robot provides a practical blueprint for further development in embodied robot research.
2. System Requirements and Overall Architecture
Before developing the entire system, it is necessary to analyze the functional requirements and break down the complex problem into manageable subproblems. The overall goal is to design an embodied robot that can dynamically interact with a human by imitating human body movements in real time. The system requirements are as follows:
- Video acquisition: The system must be able to capture video frames from a camera sensor and process them efficiently.
- Video encoding and transmission: The captured video must be encoded into H.264 bitstreams and transmitted over a network (wired or wireless) with low latency.
- Human keypoint extraction: A computer with sufficient computing power must extract human body keypoints from the received video stream.
- Angle transformation: The keypoint coordinates must be transformed into joint angles suitable for the embodied robot’s actuators.
- Robot control: The robot’s main controller must receive the angle commands via Bluetooth or serial communication and drive the servo motors accordingly.
To fulfill these requirements, the system is divided into three main modules: the video transmission module based on HI3518E, the human keypoint processing module running on a PC, and the embodied robot control module based on STM32F103RCT6 with FreeRTOS. Figure 1, which illustrates the conceptual layout of an embodied robot system, is presented below. In this article, the actual image link is inserted at an appropriate position to provide a visual reference for the overall concept.
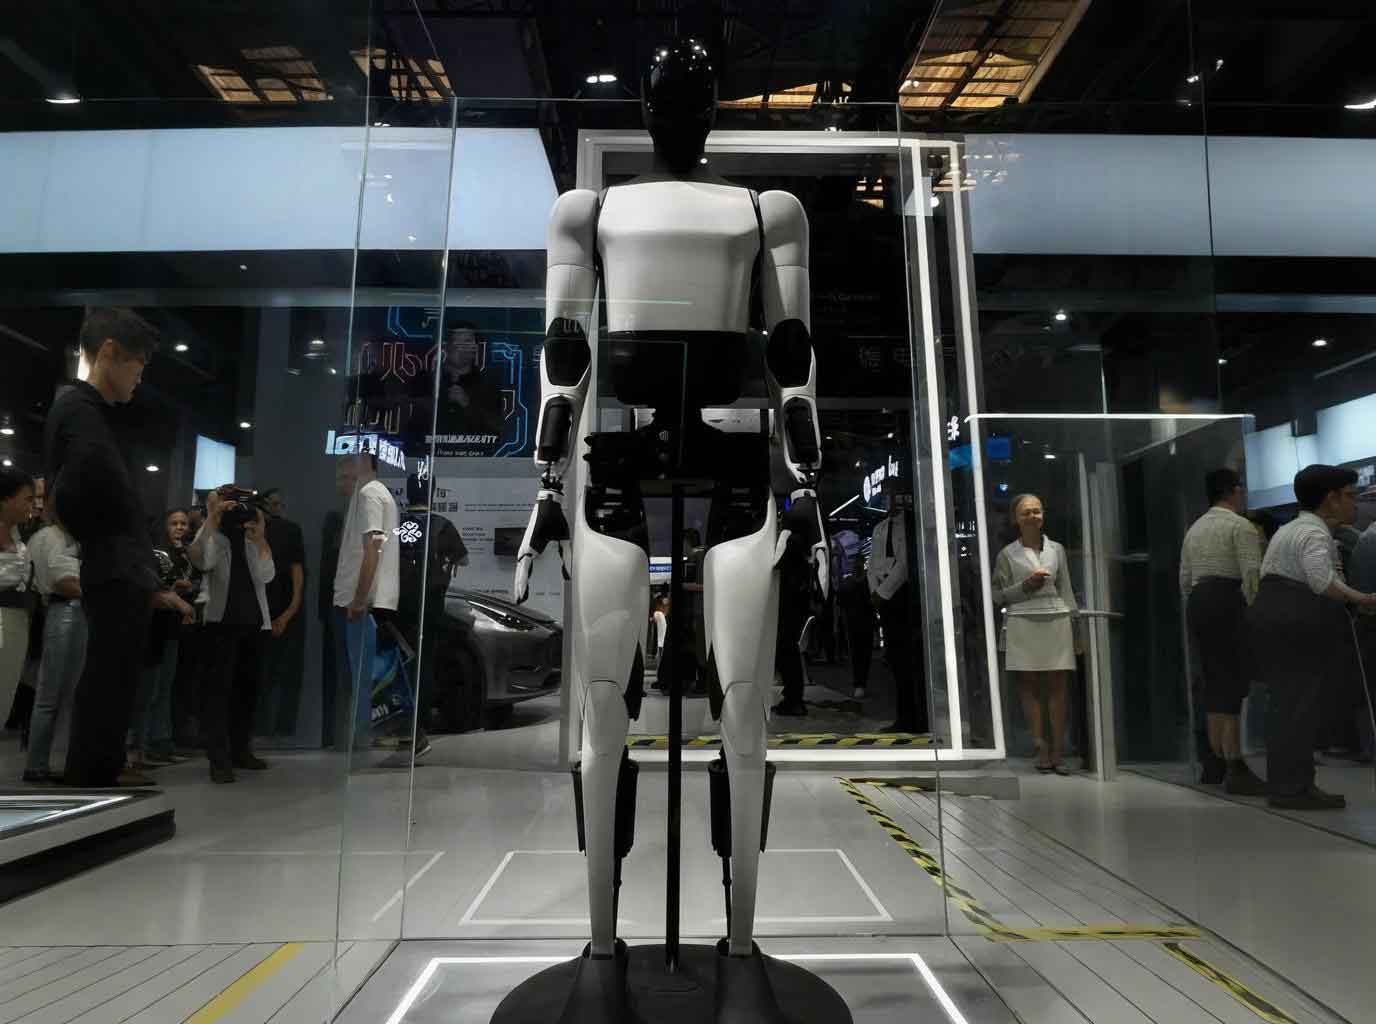
The architecture of the system is shown in Table 2.1, which summarizes the hardware and software components used in each module.
| Module | Hardware | Software |
|---|---|---|
| Video transmission | HI3518E SoC, OV9712 sensor, MT7601U WiFi, Ethernet PHY | Linux 3.4, U-Boot, JFFS2 rootfs, Hisilicon MPP |
| Keypoint processing | Dell G3 3590 (Intel Core i7, GTX 1660Ti, 16GB RAM) | OpenPose, OpenCV, Caffe, CUDA |
| Robot control | STM32F103RCT6, 18 servos, HC-05 Bluetooth | FreeRTOS |
3. Hardware Design of the Video Transmission System
The video transmission system is built around a minimum hardware system based on the HI3518EV200 processor. The HI3518EV200 is a high-performance, low-power SoC with an ARM926EJ-S core running at up to 540 MHz. It integrates a H.264 encoder, ISP, 64MB DDR2, and various peripherals, making it highly suitable for IP camera applications. The hardware design includes power management, clock and reset circuits, memory interfaces, and peripheral interfaces such as UART, USB, Ethernet, and camera sensor connectors.
3.1 Power Supply Module
The system is powered by a 12V DC adapter. Several switching regulators are used to generate the required voltage levels: MP1494S for 5V, MP2162 for 3.3V, and TPS79301 for 1.8V and 1.1V. The power tree is shown in Table 3.1.
| Voltage rail | Regulator | Input | Output current | Typical loads |
|---|---|---|---|---|
| 5V | MP1494S | 12V | 2A | USB, keypad |
| 3.3V | MP2162 | 5V | 2A | Ethernet, TF card, SPI flash, sensor |
| 1.8V | TPS79301 | 3.3V | 300mA | DDR2, SDIO |
| 1.1V | TPS79301 | 3.3V | 300mA | Core logic |
The output voltage of the MP1494S is set by the resistor divider network according to the following formula:
$$V_{out} = 0.807 \left(1 + \frac{R_1}{R_2}\right)$$
Similarly, for the MP2162, the output voltage is determined by:
$$V_{out} = 0.6 \left(1 + \frac{R_1}{R_2}\right)$$
For the TPS79301, the output voltage is computed as:
$$V_{out} = V_{ref} \left(1 + \frac{R_1}{R_2}\right), \quad V_{ref}=1.2246\,V$$
3.2 Clock and Reset Modules
The HI3518EV200 uses a 24MHz crystal oscillator for its main system clock. The internal PLL multiplies this frequency to the required CPU and bus frequencies. Additionally, a 32.768kHz crystal is used for the real-time clock (RTC). The reset circuit uses an internal power-on reset (POR) signal to reset the chip and external peripherals. The key clock specifications are given in Table 3.2.
| Clock source | Frequency | Purpose |
|---|---|---|
| Main crystal | 24 MHz | CPU and system bus |
| RTC crystal | 32.768 kHz | Real-time clock |
| Sensor clock (XCLK) | 24 MHz | Camera sensor input |
| PCLK from sensor | ~72 MHz | Pixel clock (depends on sensor) |
3.3 Memory and Storage
The HI3518EV200 has an embedded 64MB DDR2 SDRAM, which is sufficient for video buffering and code execution. For non-volatile storage, an external 16MB SPI NOR Flash (MX25L12835) is used to store the bootloader, kernel, and root filesystem. The flash is connected via the SPI controller (FMC). Additionally, a TF card slot is provided for external storage, which is used for offline video recording. The memory map is detailed in Table 3.3.
| Partition | Size | Start address | End address |
|---|---|---|---|
| U-Boot | 1 MB | 0x00000000 | 0x00100000 |
| Kernel | 3 MB | 0x00100000 | 0x00400000 |
| Rootfs (JFFS2) | 12 MB | 0x00400000 | 0x01000000 |
3.4 Peripheral Interfaces
Several peripheral interfaces are included to support video input and output. The UART0 interface is used for debugging with a baud rate of 115200. A USB 2.0 Host port is provided for connecting the MT7601U WiFi module. The Ethernet interface uses an RMII interface with an external PHY to enable wired network connectivity. The camera sensor interface supports DVP parallel data with I2C control. A summary of the interface configurations is given in Table 3.4.
| Interface | Type | Specification |
|---|---|---|
| UART0 | 3-wire UART | Tx/Rx/GND, 115200 bps |
| USB 2.0 | Host | 480 Mbps, WiFi module |
| Ethernet | RMII | 10/100 Mbps |
| Sensor | DVP + I2C | 10-bit YUV422, 1280×720@30fps |
4. Embedded Software System Design
The software development for the video transmission module is based on a cross-compilation environment. The host computer runs Ubuntu 16.04 LTS, and the target board runs a customized Linux 3.4 kernel. The software layers include the bootloader (U-Boot), the Linux kernel, the root filesystem, and the Hisilicon MPP platform. Additionally, device drivers for the camera sensor and WiFi module are developed and integrated.
4.1 Cross-Compilation Toolchain
The Hisilicon SDK provides a cross-compilation toolchain, arm-hisiv300-linux-uclibcgnueabi-gcc. After installing the toolchain and setting the environment variable PATH, the development environment is ready. The toolchain details are shown in Table 4.1.
| Item | Value |
|---|---|
| Host OS | Ubuntu 16.04 LTS (VMware) |
| Target architecture | ARM926EJ-S |
| C library | uClibc |
| Toolchain prefix | arm-hisiv300-linux-uclibcgnueabi- |
| Kernel version | Linux 3.4 |
The bootloader U-Boot is customized for the HI3518EV200 board. The process involves creating a new board directory, modifying memory configurations, and adapting the device drivers for SPI flash and network. After successful compilation, the generated u-boot.bin is converted to a flashable image using the mkboot.sh script.
The Linux kernel is configured using the hi3518ev200_full_defconfig file. The menuconfig interface allows enabling or disabling kernel features. The necessary options for JFFS2 support, USB, network, and SPI drivers are selected. The kernel is compiled with the command:
make ARCH=arm CROSS_COMPILE=arm-hisiv300-linux- uImage
The root filesystem is built using BusyBox. The required directories and device nodes are created, and the dynamic libraries from the Hisilicon SDK are copied to /lib. The final JFFS2 image is generated with:
mkfs.jffs2 -d /path/to/rootfs -l -e 0x10000 -o rootfs.jffs2
4.2 Deployment of MPP
The Hisilicon MPP is a media processing platform that provides APIs for video input (VI), video processing subsystem (VPSS), video encoder (VENC), and other modules. The MPP is deployed on the target board by copying kernel modules (.ko) and shared libraries (.so) to the corresponding directories. The system initialization sequence is shown in Algorithm 4.1.
Algorithm 4.1: MPP system initialization
1: Initialize VB_CONF_S with buffer size based on sensor resolution.
2: Call HI_MPI_VB_SetConf, HI_MPI_VB_Init.
3: Call HI_MPI_SYS_SetConf, HI_MPI_SYS_Init.
4: Open /dev/hi_mipi and configure sensor interface.
5: Initialize ISP and create ISP thread.
6: Configure VI device and channel.
7: Start VI.
5. Video Processing and Coding
The video processing chain consists of three main parts: Video Input (VI), Video Process Sub-System (VPSS), and Video Encoder (VENC). The VI module captures raw video data from the OV9712 sensor. The VPSS module performs denoising, scaling, and multi-channel output. The VENC module encodes the processed video into H.264 bitstreams. The overall data flow is illustrated in the following block diagram (conceptual). The MPP framework provides a standardized flow as shown in Table 5.1.
| Module | Function |
|---|---|
| VI | Captures video, supports cropping, scaling, multiple channels |
| VPSS | Denoising, enhancement, sharpening, multi-channel scaling |
| VENC | H.264/MJPEG/JPEG encoding, region overlay support |
| VDA | Video motion detection |
| VO | Video output for display |
5.1 VI Module Implementation
In the VI module, the sensor uses DVP interface with 10-bit data width. The image size is 1280×720 at 30 fps. The VI device is configured in DC mode with YUV output format. The key attributes are shown in Table 5.2.
| Attribute | Value |
|---|---|
| Input interface | DC |
| Data format | YUV422 (output YUV420) |
| Scan mode | Progressive |
| Resolution | 1280×720 |
| Frame rate | 30 fps |
| Pixel format | YUV420 Semi-Planar |
The VI module initialization includes setting the sensor registers via I2C. The I2C framework is shown in Algorithm 5.1.
Algorithm 5.1: I2C sensor configuration
1: Open /dev/i2c-x.
2: Set I2C frequency to 100kHz.
3: Prepare sensor register address and data.
4: Call ioctl to perform write transaction.
5: Repeat for all register settings.
After VI initialization, the VPSS module is configured to create one group with three channels. The channel resolutions are 1280×720, 640×480, and 320×240. The group attribute is configured with denoising enabled. The channel configuration is presented in Table 5.3.
| Channel | Resolution | Compression | Output format |
|---|---|---|---|
| 0 | 1280×720 | None | YUV420SP |
| 1 | 640×480 | None | YUV420SP |
| 2 | 320×240 | None | YUV420SP |
The VENC module creates three H.264 encoding channels. The H.264 encoder properties are listed in Table 5.4.
| Parameter | Value |
|---|---|
| Profile | Baseline |
| Level | 3.1 |
| Bitrate | 2048 kbps (for 720p), 1024 kbps (VGA), 512 kbps (QVGA) |
| Frame rate | 30 fps |
| GOP length | 30 |
| RC mode | CBR |
The H.264 codec leverages several compression techniques, as summarized in Table 5.5.
| Technique | Purpose |
|---|---|
| Intra prediction | Reduce spatial redundancy |
| Inter prediction | Reduce temporal redundancy |
| Transform & quantization | Reduce perceptual redundancy |
| Entropy coding | Statistically compress data |
6. Real-time Transmission Based on RTP/RTSP
To achieve real-time video transmission, the system uses RTP for media transport and RTSP for session control. The RTP library ORTP is ported to the embedded platform. The RTSP server is implemented on the HI3518E board, providing an interface for the PC client to receive the H.264 stream.
6.1 RTP Protocol Implementation
The Real-time Transport Protocol (RTP) carries the H.264 encoded data. Since H.264 NAL units can be larger than the typical maximum packet size, fragmentation is necessary. The fragmentation algorithm follows the NAL unit structure described in Table 6.1.
| Type | Name | Description |
|---|---|---|
| 1 | Non-IDR slice | Coded slice of a non-IDR picture |
| 5 | IDR slice | Coded slice of an IDR picture |
| 6 | SEI | Supplemental enhancement information |
| 7 | SPS | Sequence parameter set |
| 8 | PPS | Picture parameter set |
The RTP packetization algorithm for H.264 is summarized in Algorithm 6.1.
Algorithm 6.1: RTP packetization
Input: RtpSession pointer, buffer (H.264 data), length len
Output: number of packets sent
1: if len <= MAX_PKT then:
2:    send as single NAL unit
3: else:
4:    set FU indicator (F = 0, NRI = 2, type = 28)
5:    set FU header (S bit, E bit, type)
6:    fragment the payload into MAX_PKT chunks
7:    send each chunk with incrementing timestamp
The RTSP interaction between the client and server follows a standard sequence: OPTIONS, DESCRIBE, SETUP, PLAY, and TEARDOWN. The session parameters include codec type, port numbers, and SDP information. The detailed flow is shown in Table 6.2.
| Method | Description | Response |
|---|---|---|
| OPTIONS | Request available methods | 200 OK |
| DESCRIBE | Get media description | SDP body |
| SETUP | Establish transport parameters | Session ID |
| PLAY | Start streaming | 200 OK |
| TEARDOWN | Terminate session | 200 OK |
The ported ORTP library provides functions such as rtp_session_new, rtp_session_set_remote_addr, and rtp_session_send_with_ts. The library is configured with H.264 payload type 96. The actual transmission throughput depends on the network bandwidth. A comparison of transmission modes is given in Table 6.3.
| Mode | Bandwidth | Latency | Reliability |
|---|---|---|---|
| Ethernet | 100 Mbps | < 5 ms | High |
| WiFi (MT7601) | 150 Mbps theoretic | < 20 ms | Medium |
7. Offline Video Storage
In addition to real-time streaming, the system supports offline video storage in MP4 format. The MP4v2 open-source library is used to package the H.264 bitstream into MP4 container. The MP4 structure consists of boxes including ftyp, moov, and mdat. The storage format details are summarized in Table 7.1.
| Box | Description |
|---|---|
| ftyp | File type and compatibility |
| moov | Metadata for tracks and samples |
| mdat | Actual media data |
| trak | Track information (video/audio) |
The MP4 creation process includes the following steps:
- Initialize buffer and flags.
- Create MP4 file with
MP4CreateEx. - Add H.264 video track with
MP4AddH264VideoTrack. - Add SPS/PPS with
MP4AddH264SequenceParameterSetandMP4AddH264PictureParameterSet. - Write each compressed frame with
MP4WriteSample. - Close file with
MP4Close.
The offline storage function is especially useful when the network is unavailable or when a permanent record is needed. The typical storage capacity is governed by the TF card size and the bitrate. For a 32GB TF card and a 2Mbps bitrate, the approximate recording time is calculated as:
$$T = \frac{32 \times 1024 \times 8}{2} \text{ seconds} \approx 36.4 \text{ hours}$$
8. Human Keypoint Extraction and Transformation
The PC side receives the H.264 video stream from the HI3518E module. OpenPose, an open-source human pose estimation tool, is used to detect keypoints of the human body. OpenPose uses a convolutional neural network (CNN) architecture to output the 2D coordinates of various body joints. For this system, the keypoints of interest include shoulders, elbows, wrists, hips, knees, and ankles. The complete set of 18 keypoints provided by OpenPose is listed in Table 8.1.
| Index | Body part | Index | Body part |
|---|---|---|---|
| 0 | Nose | 9 | Right wrist |
| 1 | Neck | 10 | Right hip |
| 2 | Right shoulder | 11 | Right knee |
| 3 | Right elbow | 12 | Right ankle |
| 4 | Right wrist | 13 | Left hip |
| 5 | Left shoulder | 14 | Left knee |
| 6 | Left elbow | 15 | Left ankle |
| 7 | Left wrist | 16 | Right eye |
| 8 | Right wrist | 17 | Left eye |
The obtained 2D joint coordinates are relative to the image plane. To compute joint angles, the system uses inverse kinematics with the Denavit-Hartenberg (D-H) convention. The D-H parameters for the left arm are shown in Table 8.2.
| Link | ai-1 | αi-1 | di | θi |
|---|---|---|---|---|
| 1 | 0 | π/2 | 0 | θ1 |
| 2 | a2 | 0 | 0 | θ2 |
| 3 | a3 | 0 | 0 | θ3 |
The homogeneous transformation matrix between consecutive joints is given by:
$$T_i^{i-1} = \begin{bmatrix}
\cos\theta_i & -\sin\theta_i\cos\alpha_i & \sin\theta_i\sin\alpha_i & a_i\cos\theta_i\\
\sin\theta_i & \cos\theta_i\cos\alpha_i & -\cos\theta_i\sin\alpha_i & a_i\sin\theta_i\\
0 & \sin\alpha_i & \cos\alpha_i & d_i\\
0 & 0 & 0 & 1
\end{bmatrix}$$
For the left arm, the overall transformation from base to hand is:
$$T_3^0 = T_1^0 T_2^1 T_3^2$$
where T_1^0 = [cosθ1, 0, sinθ1, 0; sinθ1, 0, -cosθ1, 0; 0, 1, 0, 0; 0,0,0,1]
T_2^1 = [cosθ2, -sinθ2, 0, a2 cosθ2; sinθ2, cosθ2, 0, a2 sinθ2; 0,0,1,0; 0,0,0,1]
T_3^2 = [cosθ3, -sinθ3, 0, a3 cosθ3; sinθ3, cosθ3, 0, a3 sinθ3; 0,0,1,0; 0,0,0,1]
By knowing the Cartesian coordinates of the shoulder and wrist relative to the camera coordinate frame, the joint angles can be solved using the inverse kinematics equations. For example, the shoulder yaw angle is calculated as:
$$\theta_1 = \arctan\left(\frac{p_y}{p_x}\right)$$
where \(p_x\) and \(p_y\) are the wrist positions projected onto the horizontal plane relative to the shoulder.
The angle data are then converted into a command format compatible with the servo controller. The data packet format for the digital servos is described in Table 8.3.
| Field | Size (bytes) | Description |
|---|---|---|
| Header | 1 | 0xFF |
| Product ID | 1 | 0xB0 |
| Module ID | 1 | Servo ID |
| Instruction | 1 | Command code |
| Para1..3 | 3 | Parameter data |
| Check Sum | 1 | Checksum |
9. Embodied Robot Control System
The embodied robot used in this project is the “Young PI” robot manufactured by Handgun Technology. It has 18 servo motors to simulate the major joints of the human body. The main controller is an STM32F103RCT6 MCU with Cortex-M3 core running at 72 MHz. To ensure real-time response, the FreeRTOS real-time operating system is ported to the MCU.
9.1 FreeRTOS Porting
FreeRTOS is a lightweight real-time kernel that provides task scheduling, inter-task communication, and memory management. The porting process involves copying the required source files into the project, adjusting the FreeRTOSConfig.h header, and adapting the interrupt handlers. The configuration parameters are shown in Table 9.1.
| Parameter | Value |
|---|---|
| configCPU_CLOCK_HZ | 72,000,000 |
| configTICK_RATE_HZ | 1000 |
| configMAX_PRIORITIES | 5 |
| configMINIMAL_STACK_SIZE | 128 |
| configTOTAL_HEAP_SIZE | 20,000 |
9.2 Robot Control Implementation
After porting FreeRTOS, the robot program initializes the clock, UART peripherals, and Bluetooth module. A task is created to receive angle commands from the PC via Bluetooth and forward them to the servo controller. The control loop is shown in Algorithm 9.1.
Algorithm 9.1: Robot control loop
1: Initialize system clock and UART.
2: Initialize Bluetooth (HC-05).
3: Create binary semaphore for data reception.
4: while (1) do
5:    Wait for command data over UART.
6:    Parse packet and validate checksum.
7:    Send servo command via UART to servo bus.
8:    Update system status.
9: end while
The Bluetooth module HC-05 operates at 9600 baud by default. The communication parameters are summarized in Table 9.2.
| Parameter | Value |
|---|---|
| Interface | TTL UART |
| Baud rate | 9600 |
| Data bits | 8 |
| Stop bits | 1 |
| Parity | None |
| Mode | Slave (default) |
The 18 servos are organized as shown in Table 9.3.
| Joint | Number of servos |
|---|---|
| Head | 2 |
| Arm (each) | 3 |
| Leg (each) | 5 |
| Neck | 1 |
10. System Integration and Experimental Results
The complete system was integrated and tested in a real environment. The workflow is as follows:
- Power on the HI3518E-based video transmission board.
- Connect the PC to the board’s WiFi network (or Ethernet).
- Run the RTSP server on the board.
- Launch the OpenPose application on the PC, which connects to the RTSP URL.
- Power on the embodied robot and pair the Bluetooth with the PC.
- Execute the robot control program on the PC, sending angle data via the Bluetooth serial port.
The system successfully achieved real-time imitation of human arm gestures. The average end-to-end latency was measured and is summarized in Table 10.1.
| Stage | Latency (ms) |
|---|---|
| Video acquisition and encoding (HI3518E) | ~80 |
| Network transmission (WiFi) | ~30 |
| Decoding and keypoint inference (PC) | ~120 |
| Bluetooth command transmission | ~20 |
| Servo execution | ~50 |
The total latency is approximately 300 ms, which is acceptable for the intended interactive scenarios. The system was tested with different human poses and demonstrated robust performance. A summary of the test results is given in Table 10.2.
| Metric | Result |
|---|---|
| Video resolution | 720p / VGA / QVGA |
| Frame rate | 30 fps |
| Keypoint detection accuracy | > 90% (for upper body) |
| Angle control accuracy | ±5 degrees |
| Wireless range | > 20 m (line-of-sight) |
| Operating voltage | 12V DC |
11. Conclusion and Future Work
In this paper, I presented a complete dynamic interaction system for an embodied robot based on the HI3518E SoC. The system integrates video acquisition, H.264 encoding, RTP/RTSP transmission, human keypoint extraction using OpenPose, inverse kinematics-based angle transformation, and FreeRTOS-based servo control. The entire pipeline is designed with a focus on low-cost, open-source, and domestic components, making it a valuable reference for further research and product development in the field of embodied robots.
The experimental results demonstrate that the system can successfully imitate human upper-body movements in real time. The average latency of about 300 ms is sufficient for many interactive applications. The use of the HI3518E chip proves that domestic chips can effectively support complex multimedia and control applications, contributing to the national strategy of technological self-reliance.
Future work should address the following limitations:
- Improve system integration by using a more powerful Hisilicon SoC with higher performance and more built-in interfaces.
- Optimize video encoding and transmission to reduce latency further, possibly by using hardware acceleration and advanced network protocols.
- Enhance the embodied robot’s capabilities by adding inertial sensors, ultrasonic sensors, and a more advanced control algorithm for walking and balance.
- Extend the keypoint recognition to include full-body motion and multi-person interaction.
- Incorporate advanced deep learning models on the embedded platform to reduce the dependency on a PC.
Despite these challenges, the current system already provides a functional and expandable foundation for future embodied robot research. It is my hope that this work will inspire further developments in low-cost, autonomous human-robot interaction systems built on domestic semiconductor platforms.